Our last installment of our Master Bedroom Makeover revolves around what we did with that newly-freed wall.
I didn't want to make the wall too busy, but I really wanted to display some lovelies to admire when we are in our room. I decided to build three floating shelves, based upon plans from Ana White. Since Ana does such a great job of breaking it down (I practically built these myself, so that tells you how easy it was), I won't reinvent the wheel. But, I will give you my tips for making the process easier:
- When building the frame for the outer box, make sure you have someone there to hold the pieces to get you started.
- On the same lines, build the outer part of the frame first, then put the center supports in.
- Be careful when sanding down the wood putty, meaning don't rest the shelves on the edges, as the putty that's on there may chip off and cause you to have to re-putty and re-sand.
But without further adieu, here are my shelves!
The shelves are two feet wide, which allows for enough room for the full length mirror without looking too crowded. As I mentioned previously, I made these shelves practically by myself. I needed a couple extra hands a couple times, but for the most part, it was all me! Girl Power!
And now, for the guided tour...
On the bottom shelf, we have my jewelry tree (Andy uses it too), an apothecary jar with potpourri (used to be in the living room), a handmade pen that my Dad made Andy, and my regal lion from this old post (also used to be in the living room).
The second shelf has two hurricane glasses that picked up for a couple bucks at a thrift store, and inside them are some antique postcards showing sights of San Diego. I picked those up through an online auction. Some were actually sent back in the early part of the 1900's. In the middle is a basket for Andy to put his wallet, phone, watches, etc.
And up top, we have a mix and match of thrifted wood candlesticks. Still trying to decide whether or not to refinish them. Next is our favorite wedding picture in a frame that was handmade as a wedding gift. It has parts of our invitation, a Scrabble "F", a toy ring, and some pretty stones. It's really similar to a memory jug, if you have seen or heard of those before. And then, last but not least, is a small ceramic quail that I picked up for a couple bucks.
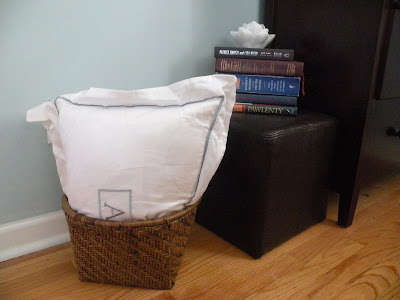
On the floor is a basket that holds our monogram pillows. Those rarely make it onto the bed. Just keepin' it real. Then I snagged one the footstools we no longer use in the living room to stack our books on. On top of the books is a little lotus votive that, you guessed it, I picked up for a buck at a thrift store.
This cleared up a ton of room on top of the dresser. All that lives there now (besides the TV) is Andy's change jar.
This was actually a coin jar that came with a pair of Harley Davidson Boxers that I bought Andy for his birthday last year. While we as big of HD fans as the day is long, a black tin container with a skull on it was not really giving off the vibe I'd hoped for in our room. So, I secretly covered it with some extra fabric I had on hand and a couple white ribbons. Blends in muuuuch better. I also no longer have nightmares of skeletons clinking change...
That's it! That's our Master Bedroom makeover! Thanks for staying with me as the project unveiled. How about you guys? Have you wrapped up any projects lately? Or maybe you are just starting some that have several phases? I'd love to hear!


